It is critical to perform this task well since your system’s operation (from its efficiency to the degree of comfort it can provide) relies heavily on the coils. You also must be certain not to harm the coil fins while you are cleaning, because they are important in transferring heat and are relatively fragile. Due to these issues and for general convenience, it can be smart to get your coils cleaned periodically by a trained AC repair technician.
Utilizing a professional AC maintenance service not only helps get the coils clean but also is an opportunity for an expert to inspect the unit and optimize its efficiency. Even if you do decide to forego DIY cleaning, it can be helpful to know the steps of cleaning air conditioner coils, so you understand what the AC repair specialist is doing.
Supplies for this project
- Screwdriver
- Coil brush
- Fin comb
- Garden hose
- Foaming coil cleaner
Disclaimer: We recommend you contact a licensed AC company to handle your air conditioning maintenance and repair needs, including cleaning your AC coils, to prevent unnecessary injury or damage to your unit.
Cleaning AC Coils in 7 Simple Steps
Here is the basic process:
Step 1. Turn off the power to the condensing unit (or window unit) and shut off the AC via the thermostat (if applicable).
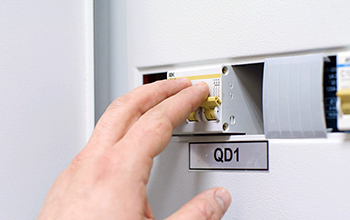
This process is a bit trickier if you have central air conditioning. You need to pull out the fuses or stab connection through the disconnect, which should be mounted on the house near the condensing unit. You should be able to remove the terminal simply by pulling on the handle. Be aware that power will still be flowing into the disconnect, just not to the unit.
If you cannot locate a disconnect, go to your breaker panel — where you should find a breaker specific to the AC — and cut the power there. If you do that, you will be removing power from the disconnect in addition to the unit.
Step 2. Access the coils.
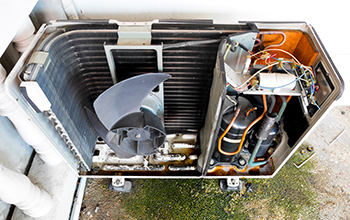
If you have central air, you will access the coils by taking the screws out of a removable panel. If you are servicing a window unit, you will get to the coils through the end that extends out from your home.
If you are unsure how to get inside the AC, look at your owner’s manual. It will provide diagrams showing you the location of the coils and how to access them. The manufacturer’s guidance should be extremely helpful in this step.
Note that accessing your evaporator coils is typically not as easy as accessing the condenser coils, even if you do need help from a 24-hr. AC repair service to clean them, you can take preventive steps to keep them from getting dirty.
Step 3. Visually inspect the coils and remove debris.
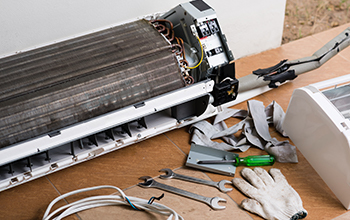
This step is also typically a bit more intensive with central AC since the unit is on or very close to the ground. A broom or brush can be used to remove larger debris, but you will need to be cautious since it is easy to bend the fins. Grass clipping, leaves, and other detritus should be removed from the louvers and fins. Also, look for weeds or other vegetation that might be growing into the coils’ space.
It is important to know how to clean AC coils without damaging your unit. Once larger debris is out of the way, you can do the more delicate work with the fin comb. With the comb, remove wet debris or dirt from between the coils. Also, straighten any fins that are bent. Wiggle your way through carefully. Do not force your way through any resistant areas.
Step 4. Presoak the unit.
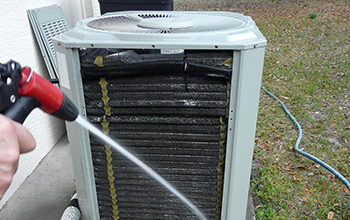
Get out your garden hose and spray the unit from the inside out. Beyond the interior, also spray the external base, where there might be some remaining grass or other debris.
Generally, this equipment is built to withstand the elements, so the water should not be an issue. However, you do not want to spray straight at any electrical parts, including the disconnect.
Step 5. Apply the cleaner.
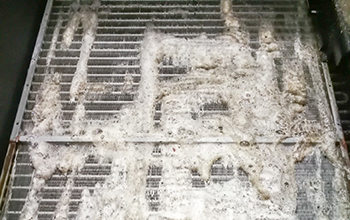
Your coil cleaner is critical to getting out whatever grime is in between the fins. This could be either a no-rinse or standard variety. Either way, its foaming capability allows you to remove the dirt you otherwise could not reach.
Check the can to see how long you want the cleaner to soak. Shake the product and then spray it, completely covering the coils. You should see it start to foam right away. The entire area should be concealed shortly. Wait for the time listed in the can’s instructions.
When it comes to your evaporator coils, you will want to use an indoor, self-rinsing cleaner. Once you apply this type of cleaner, you are finished; when you turn your system on again, the cooling process will allow it to rinse away.
Step 6. Rinse off the cleaner.
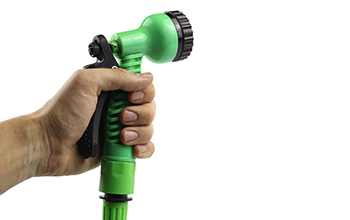
If you are using a standard cleaner, you will need to grab your hose again and rinse it away. Spray side-to-side slowly to make sure all the cleaner has been removed.
Step 7. Reassemble the unit.
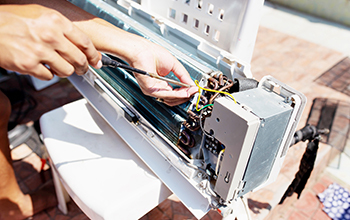
Finally, you just need to reattach any panels you have removed using your screwdriver.
A Strong AC Maintenance Partnership
Now you know how to clean your AC coils. However, you may want to go with a professional 24-hr AC repair service for convenience and safety. Easy A/C offers quick, affordable, and reliable AC services throughout the Tampa Bay area. And we offer up-front pricing so ensure there are no surprises.

